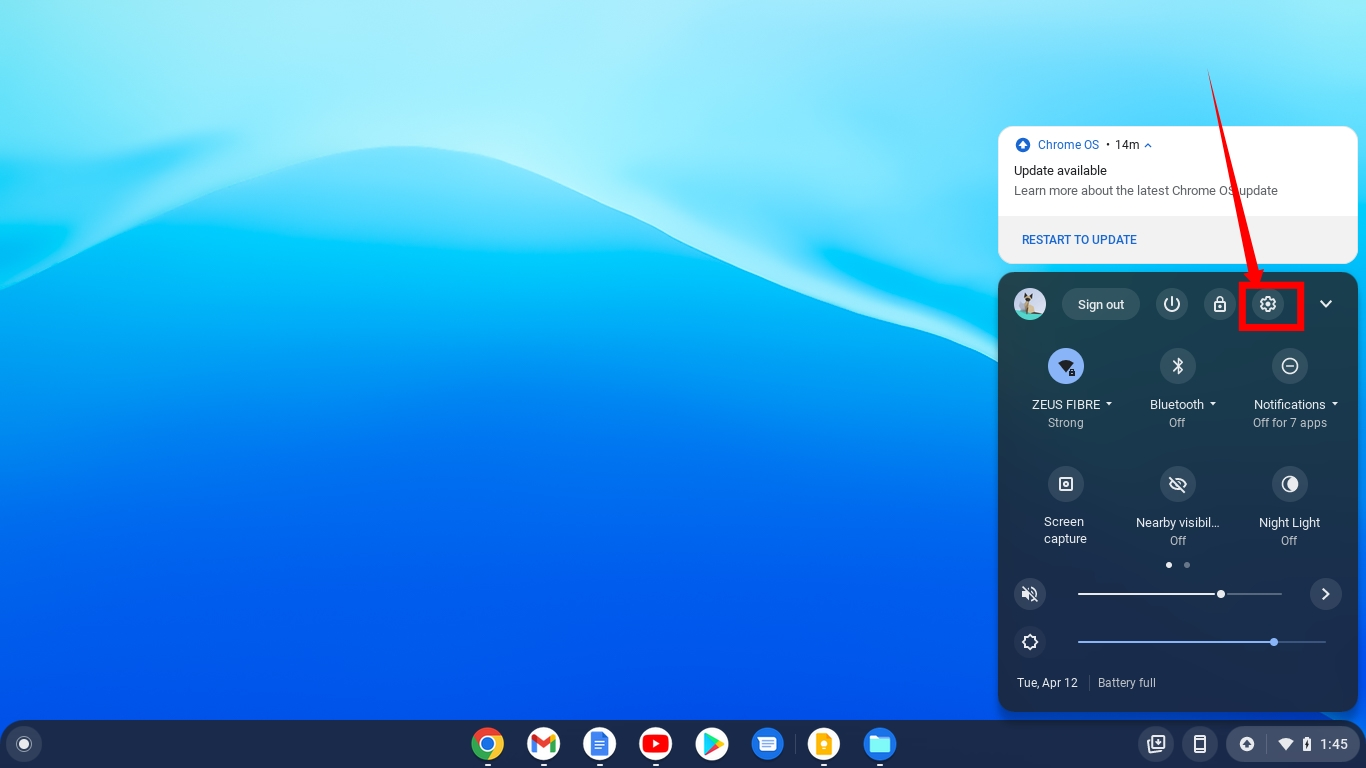
Notifications normally appear on the bottom right hand of your Chromebook, and managing them has improved substantially with every new update. The notifications here include updates, for example, when a screenshot is taken, app updates, restart needed after OS update, and marketing messages from installed apps.
How to disable notifications of individual apps
Click the status tray at the bottom right-hand corner of the Chromebook and then select Settings.
On the left-hand side of the Settings window, click on Apps and then Manage Your Apps.
Use the search box to search for the app whose notifications you would like to disable.Toggle the notifications switch of this app off, and you will no longer receive any notifications from this app.
Related Article: How to run Chrome OS Flex on Windows PC or MacBook
Disabling notifications they pop-up
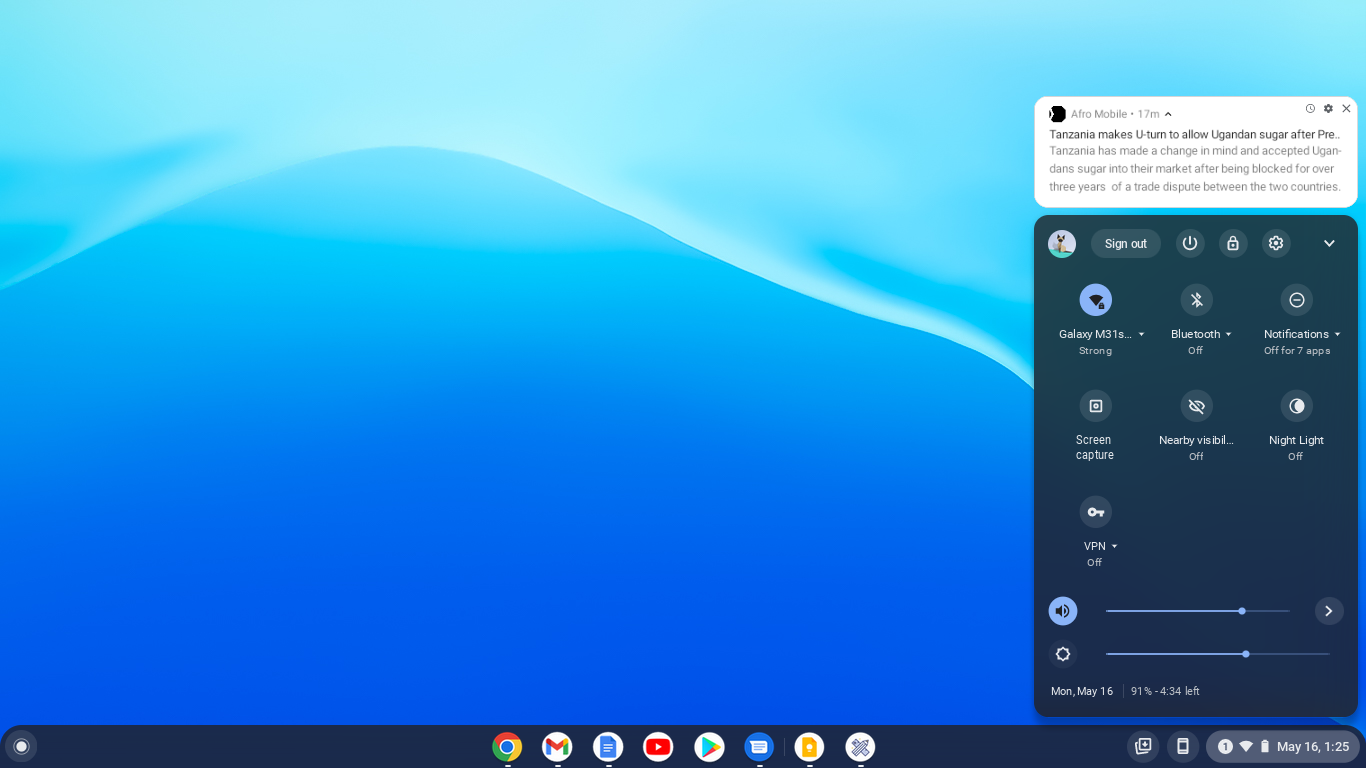
When you see a notification popup you don’t want, click on the clock icon to snooze the notifications for a specified period. Intervals of 15 minutes, 30 minutes, one hour, or two hours are options.
You can also click on the settings icon to disable notifications for that particular app.
You can’t disable notifications for the Chrome OS system apps such as Camera, Calculator, Files, etc.
Using the Do Not Disturb mode
This is one effective way to silence all notifications instantly. To enable the Do Not Disturb mode:
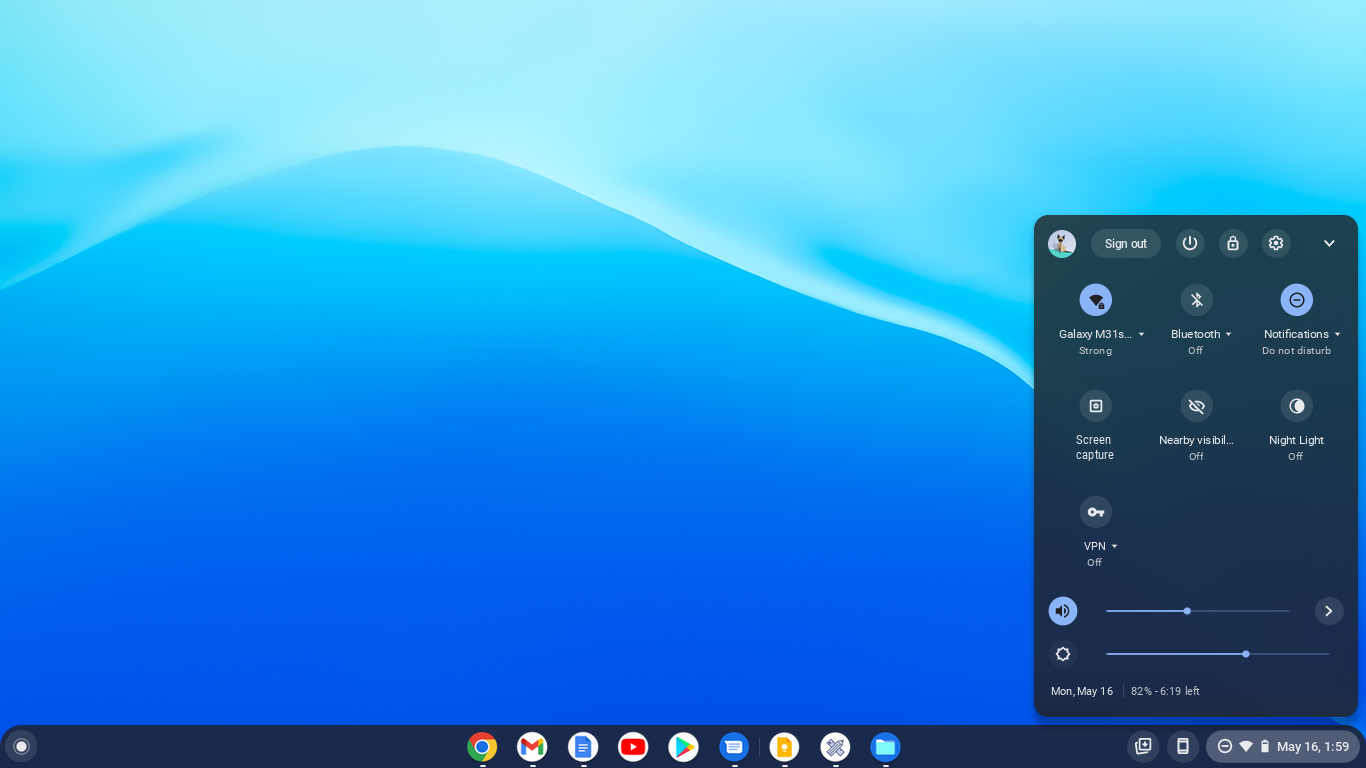
Click the status tray at the bottom-right corner of your Chromebook.Toggle the button labelled “Notifications.”Your Chromebook will add a new dash-like icon in the status tray to indicate that “Do Not Disturb” is enabled.
When Do Not Disturb is enabled, you’ll silence all incoming notifications, and your Chromebook won’t prompt you for every new alert. You can still see all pending notifications in the list above the Quick Settings panel. That’s it, friends. If you have any questions regarding Chromebook notifications, please let me know in the comments section below.


