In this post, we’ll show you how to take full web page screenshots on iPhone and Mac. Because this is a post about screenshots, it’s also hard to take screenshots of the process. So, please read and follow the steps carefully. READ MORE: How to Take Full Page Screenshots in Google Chrome.
Take Full Web Page Screenshots on iPhone
Follow the steps below to take a full web page screenshot if you’re using an iPhone.
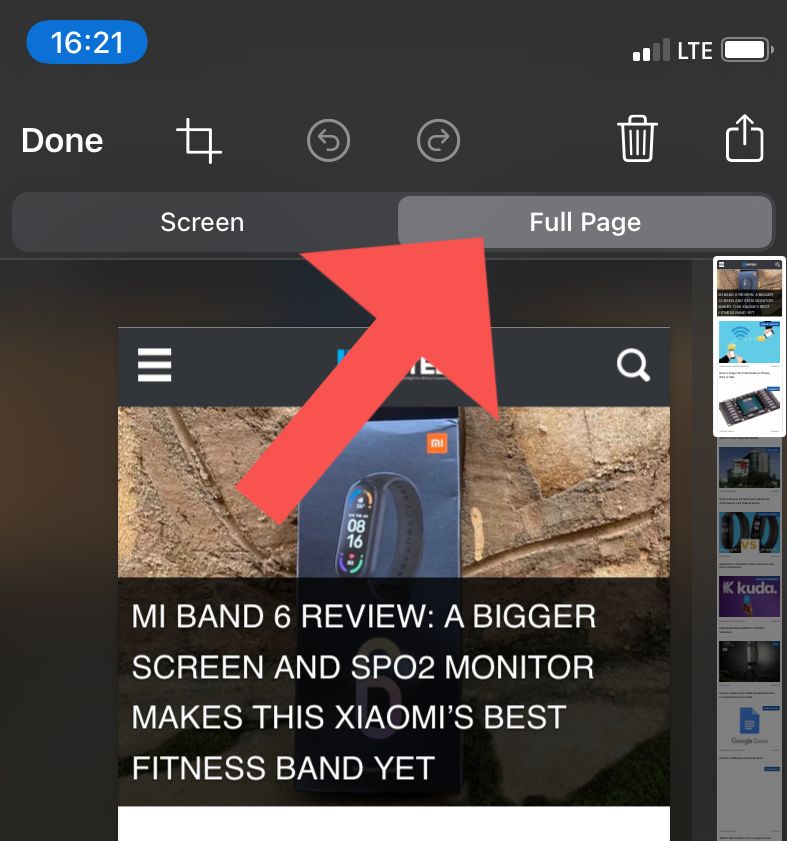
First, take a screenshot. For iPhones with a face ID, you can simultaneously press and release the side button and volume up button to do this. While iPhones with a home button requires you to simultaneously press and release the Home button and the side button or Sleep/Wake button (this depends on the model).Once you take a screenshot, tap the screenshot which will be shown at the lower left corner of your iPhone. Do this before it disappears.Select Full Page
Save the screenshot to your device or share directly to any third-party platform.
Take Full Web Page Screenshots on Mac
Taking full web page screenshots on a MacBook takes a different route. Mac users cannot take full web page screenshots directly but there’s a workaround. Please follow the steps below to take a full web page screenshot on your MacBook.
Navigate to the web page you want to captureHold down the Command key and “–” button to reduce the size of the web page until the entire web page content is visible
Press Command-Shift-4 and the cursor turns into a crosshair pointerPosition the pointer where you want to screenshot, hold down the mouse pad and drag until it covers the entire webpage.Release the mouse pad and it makes a shutter sound.
And that’s how you take a full web page screenshot on iPhone and MacBook. On your iPhone, the full web page screenshot saves as a PDF document to your files. However, because of the not-so-straightforward route on a Mac, it saves as a normal photo – PNG. Please let us know in the comments section if you get stuck in any of the processes. We’re happy to help you out.


